If you’ve ever watched a movie where the camera zooms in on a character’s face during a crucial moment, you might have thought, “How can I do that in my own videos?”
When editing your videos, you might want to zoom in or out on certain clips during post-production. A great way to achieve this effect is by using keyframes in a video editing tool like Wondershare Filmora.
After importing your videos, you can zoom in with Filmora keyframes using the built-in presets or by customizing the actions to suit your style.
We’re about to reveal how to zoom in on your footage just like the pros do in Hollywood. If you’re ready to take your videos from “pretty good” to “wow, this is amazing,” let’s dive in!
Post Contents
Part 1: What are The Different Ways To Work on Keyframes
Before we get into how to add a keyframe feature in Filmora, let’s go over some basics.
Keyframing is a popular editing technique where you set important points (called keyframes) at the beginning and end of a clip. Imagine you have a video that plays at 20 frames per second (fps). To edit this video, you can spread out the frames, mark the starting and ending points (keyframes), and then add special effects between those points.
Wondershare Filmora is a powerful video editing tool that gives you two ways to work with keyframes:
1. Preset Animation: This option includes ready-made effects that you can easily apply to your clip. These effects save you time but don’t allow for much customization.
2. Customize Animation: If you want to create your own unique effects, you can choose this option. While it takes more time, it lets you get the exact results you want.
Part 2: How to Zoom Videos In/Out with Preset Animation in Filmora
Wondershare Filmora lets you zoom in or out on your videos using keyframe animations. You can do this with preset animations or by customizing them yourself. The preset animations are easier to use because you just pick an effect and apply it to your video. Here’s how to zoom in or out on your video using these presets:
Step 1: Load Your Video into Filmora
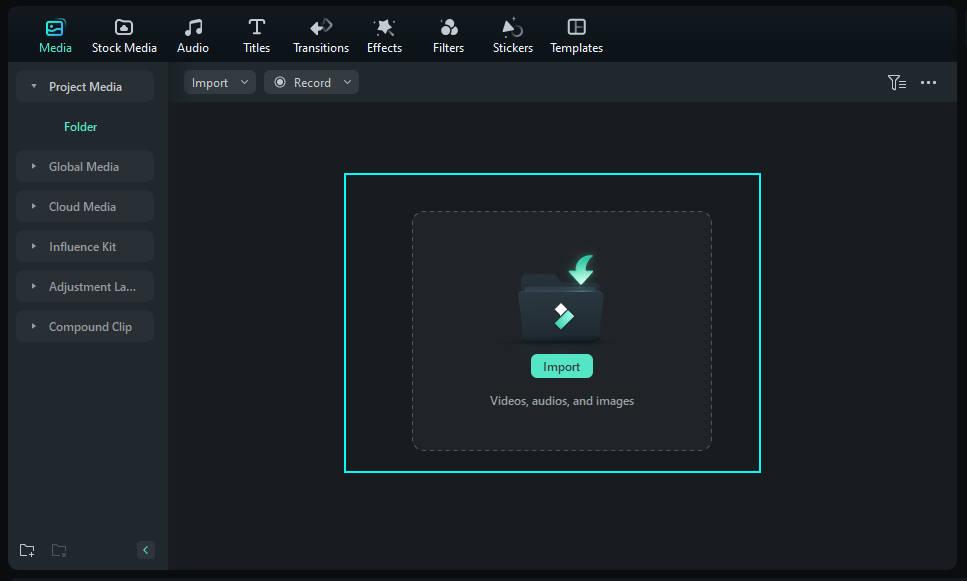
First, open Wondershare Filmora on your computer. Click on the “Import” button at the top to load your video. You can also click on the “Add Media” button to bring in your video file.
After the video loads, drag it down to the timeline at the bottom of the screen to start editing.
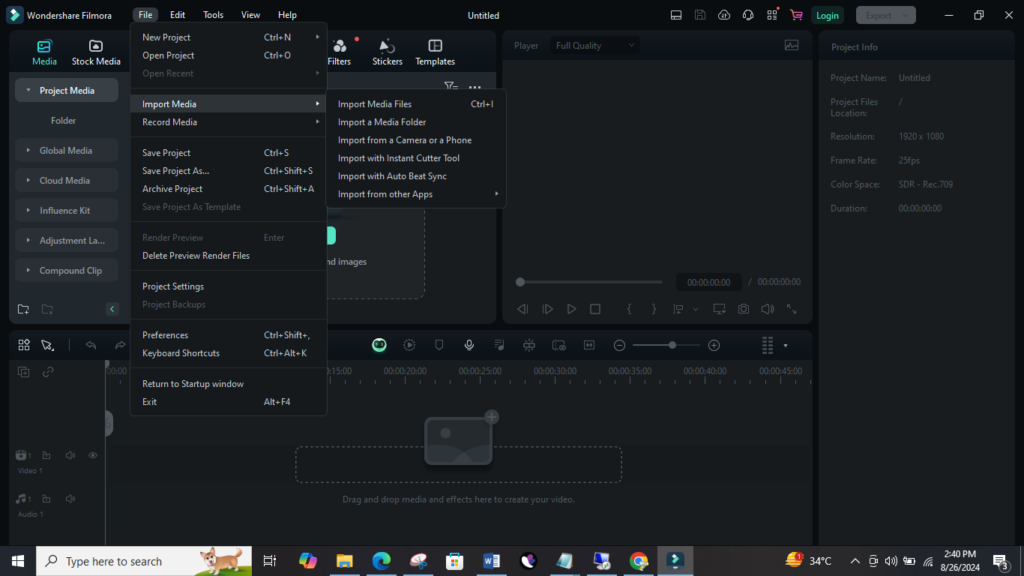
Step 2: Use Preset Animations to Zoom In/Out
Once your video is on the timeline, right-click on it and choose “Add Animation” from the menu that pops up.
A new window will appear, showing different animation options under the “Preset” tab. Here, you’ll find effects like “Zoom In,” “Zoom Out,” “Pause,” “Slide Up,” and more.
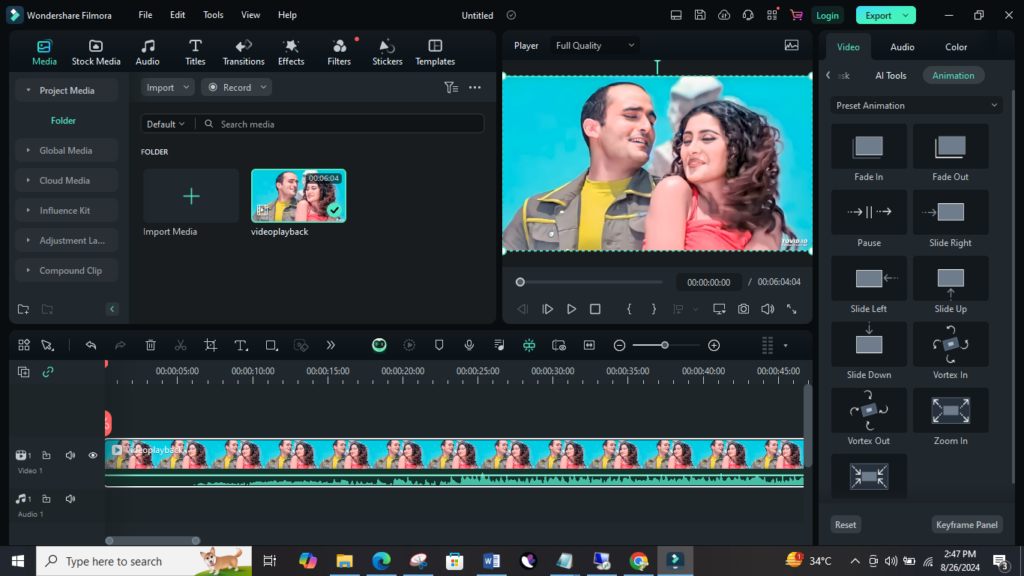
To zoom in or out, select either the “Zoom In” or “Zoom Out” effect. Drag the effect and drop it on the part of the video where you want the zoom to happen.
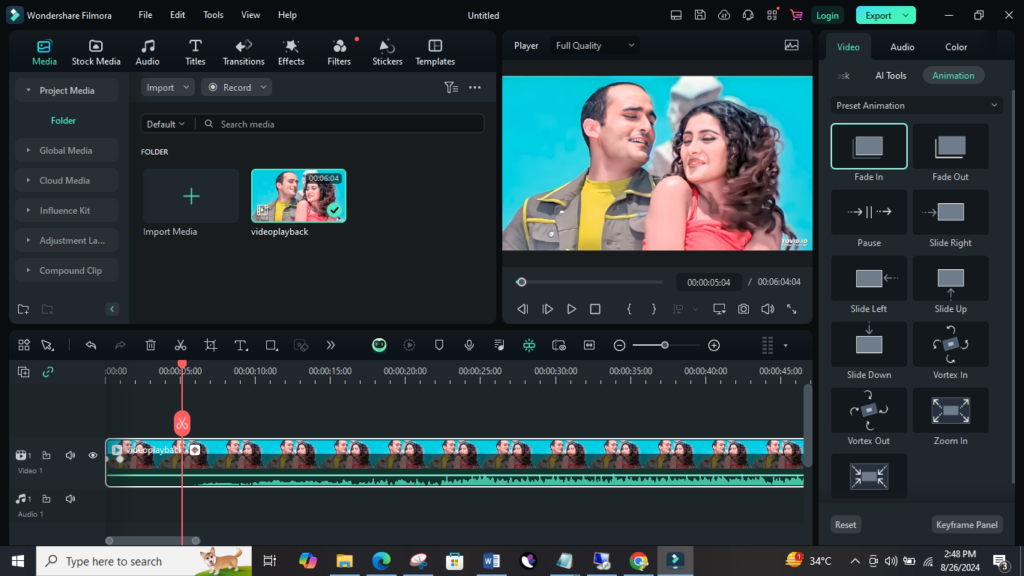
Step 3: Edit and Save Your Video
After applying the zoom effect, you can keep editing your video using Filmora’s other features. You can watch the changes on the preview screen. If you’re happy with how it looks, click on the “Export” button to save your video in the format you want.
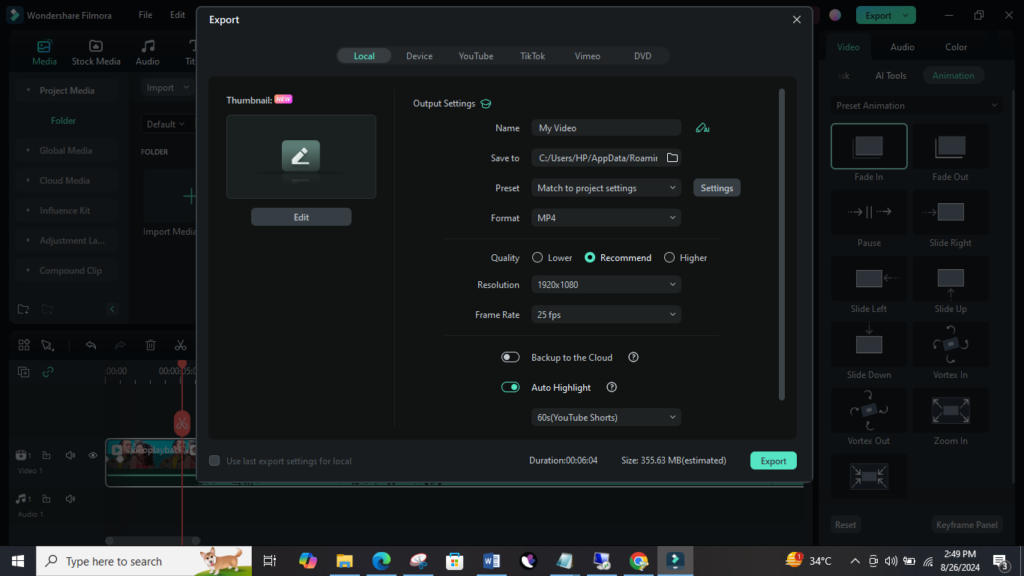
Part 3: How to Zoom Videos In/Out with Customize Animation in Filmora
If you want to make your video edits more personal using the Filmora keyframe feature, you can use the “Customize” tab. This allows you to change things like the size, transparency, position, and rotation of any part of your video. The best part is that you can pick exactly where in the video you want these changes to happen.
Here’s how to zoom in or out on your video using the Customize Animation feature:
Step 1: Load the Video You Want to Edit
First, open Filmora on your computer. Drag and drop your video into the program. You can also click the “Add” button to find your video file and then move it to the timeline at the bottom to start editing.
Step 2: Use the Customize Video Keyframe Animations
Once your video is in the timeline, right-click on it and choose “Add Animation.”
A special window will pop up, showing the Filmora Keyframe Animation options. This time, click on the “Customize” tab instead of “Preset” to see more options.
First, you’ll need to choose a keyframe to add your effects. Click the “Add” button and move the indicator on the timeline to the spot where you want the zoom to start or stop.
In this section, you can change different settings to rotate, move, or resize the video. To zoom in or out, go to the “Scale” option and adjust the values to get the zoom effect you want.
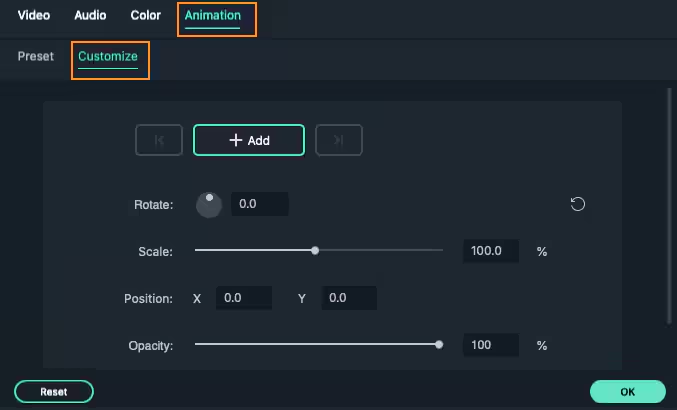
You can move the indicator to a second or third keyframe to keep adjusting the zoom. There are also other settings you can tweak to add more effects.
Step 3: Save Your Edited Video
After making all the changes, click on the “Export” button to save your video in the format you like.
Conclusion
In summary, keyframing in Filmora is a powerful tool that allows you to zoom in or out on your videos with precision. You can use the easy preset animations for quick edits or dive into the Customize Animation feature for more control. By following simple steps, you can load your video, apply the desired zoom effect, and fine-tune the details. Once satisfied, you can save your edited video in your preferred format. Whether you’re aiming for a quick edit or a more personalized touch, Filmora’s Keyframing options give you the flexibility to achieve professional-looking results.