Recovering Data from Synology NAS Server can be a daunting task, especially if you do not have access to the right tool. In this article, we will discuss in detail about Synology NAS Server and its data recovery with the best methods.
Post Contents
Introduction
Reliable storage methods for sensitive data are always in demand not only among big setups but also among home users. Synology NAS Server is in use owing to the long list of benefits it offers. Technological advancements over the years have resulted in the use of RAID for NAS setup rather than using traditional hard drives like earlier. Using RAID not only improves the performance but also the reliability and redundancy of the data.
Using Synology NAS Server comes packed with features to ensure the safety and security of your important and sensitive data. The server is capable of automatic file synchronization among multiple devices and setups. It also offers an excellent photo management feature that allows you to seamlessly manage, and organize all your images. When it comes to comparing Synology NAS Server with other cloud solutions, the former not only scores in terms of features but also effectiveness and usage.
Understanding Synology NAS Server
Standing for Network Attached Storage, NAS offers a centralized location on a network for storing your data. Here the hardware is connected to a network for the data storage purpose. Network-attached storage allows businesses to have flexibility with their data storage but several times the current setup may not be sufficient and here adding more disks seems to be an obvious solution. Though additional disks can be added, this may slow down the performance and also lead to space wastage.
Here Synology NAS Server works as the best solution as it uses a Redundant Array of Independent Disks ( RAID) system where storage drives in different capacities are used more efficiently. Synology NAS Server helps you create a private cloud storage for storing, accessing, taking back up, and sharing files quickly, easily, and in a secure manner.
Key Features of Using Synology NAS Server
- Allows customizing the storage as per your requirements using a variety of HDD and SSDs.
- Intuitive file access as well as sharing.
- Automatic backing up the PCs and Mac systems.
- Allows to secure and organize the media.
- Allows securing the home with private video surveillance.
So, if you are looking to maximize your storage space without weighing down the performance along with excellent media management, Synology NAS Server is a one stop solution.
Synology NAS Data Loss Scenarios
Though Synology NAS Server is quite reliable and safe, like any other method there is always a chance of data loss. Some of the scenarios and reasons leading to Synology NAS Data loss are listed below.
- Improper setup of RAID
- Initialization or formatting of disk for using the NAS RAID disks.
- Abrupt power loss, improper shutdown, or improper RAID array repair leading to improper configuration.
- Data loss might be caused by an attack of viruses or malware.
- Controller malfunction.
Besides the above, there may be other user or system errors that might result in NAS data loss.
Synology NAS Data Loss Recovery
Irrespective of the method used, one has to be prepared for data loss and if one encounters one, some solutions can be used for the recovery. In the case of Synology NAS Data Loss restoring data from the backup or hot-swapping the failed drive can be tried. If both of these methods do not help you or fail to recover the lost data, using a professional RAID Recovery Data Software is the best solution.
Using Wondershare Recoverit for Synology NAS Data Recovery
When it comes to RAID Recovery Data Software, the best one we recommend is Wondershare Recoverit. This excellent tool from Wondershare is a complete data recovery tool that allows for recovering a wide range of lost data from several devices and scenarios. The software is available for quick download on your Windows 11/10/8.1/8/7/Vista and MacOS X 10.10-MacOS 13.
The NAS Data Recovery feature of Wondershare Recoverit allows the recovery of deleted, lost, as well as corrupt files not only from the latest but also from the oldest NAS configurations.
Wondershare Recoverit NAS Data Recovery Supported Scenarios
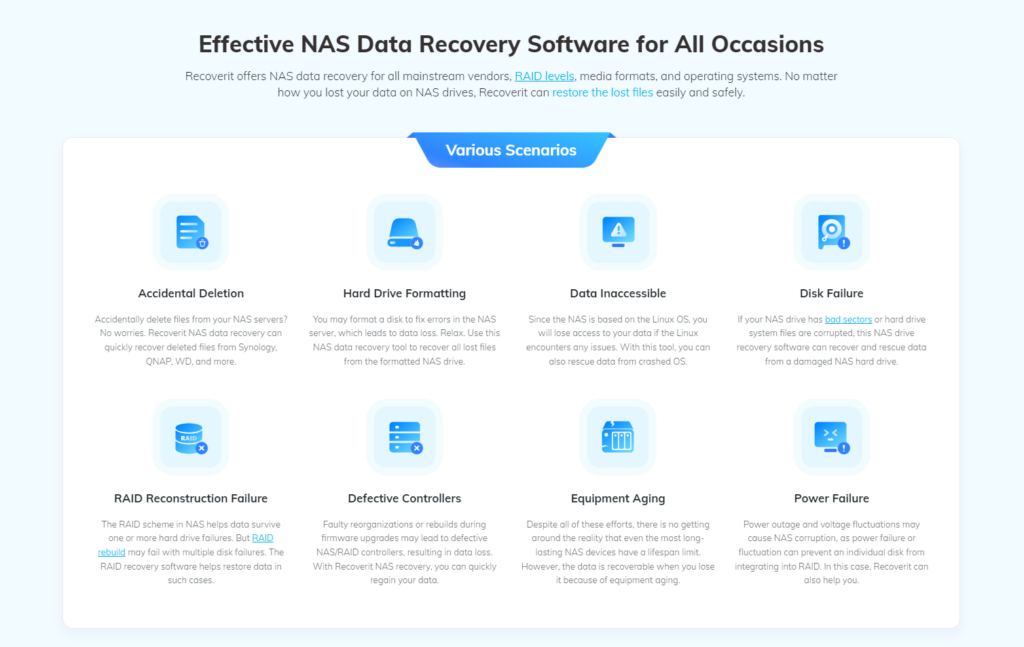
- Hard Drive Formatting
- Accidental deletion of the files
- Disk failure
- RAID reconstruction failure
- Defective controller
- Inaccessibility of the data
- Power fluctuation and failure
- Aging of the equipment.
Wondershare Recoverit Supported RAID levels
The software supports all RAID types including RAID 0, RAID 5, RAID 6, and RAID 10.
Wondershare Recoverit Supported File Types
The software allows recovering over 1000 file formats including photos, graphics, videos, mails, music files, documents, and many more.

Pros of Using Wondershare Rcoverit for NAS Data Recovery
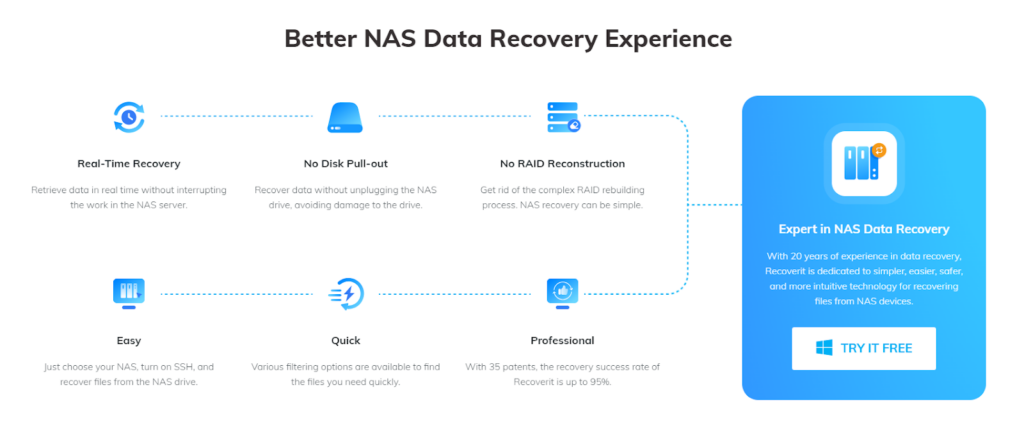
- No disk pull-out out needed for data recovery to avoid drive damage.
- Simple and easy to use.
- Real-time recovery
- No RAID reconstruction
- A success rate of 95%
- Support multiple filtering options to get the desired files quickly.
- Windows and Mac support
- Available in multiple pricing plans.
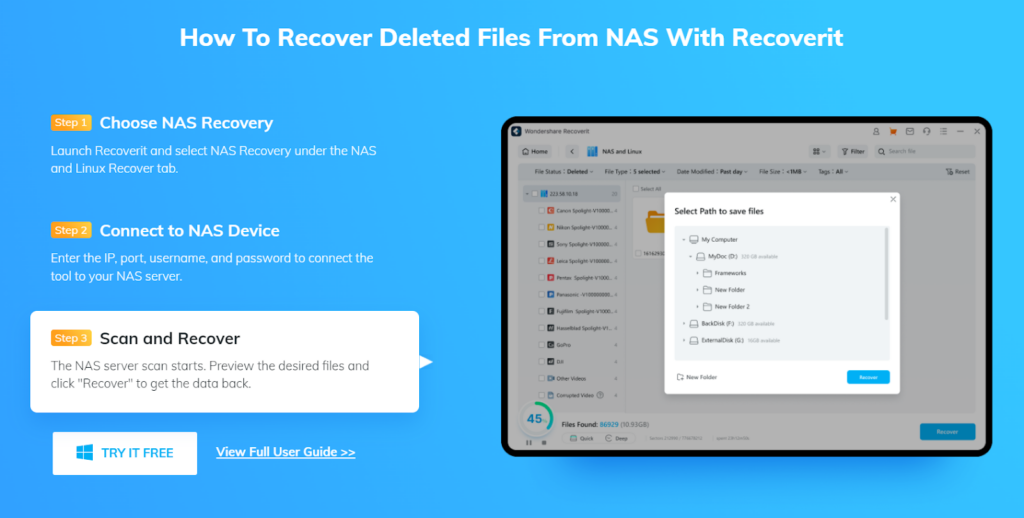
Guide for NAS Data Recovery Using Wondershare Recoverit
The below listed are steps to use the software for NAS Data Recovery
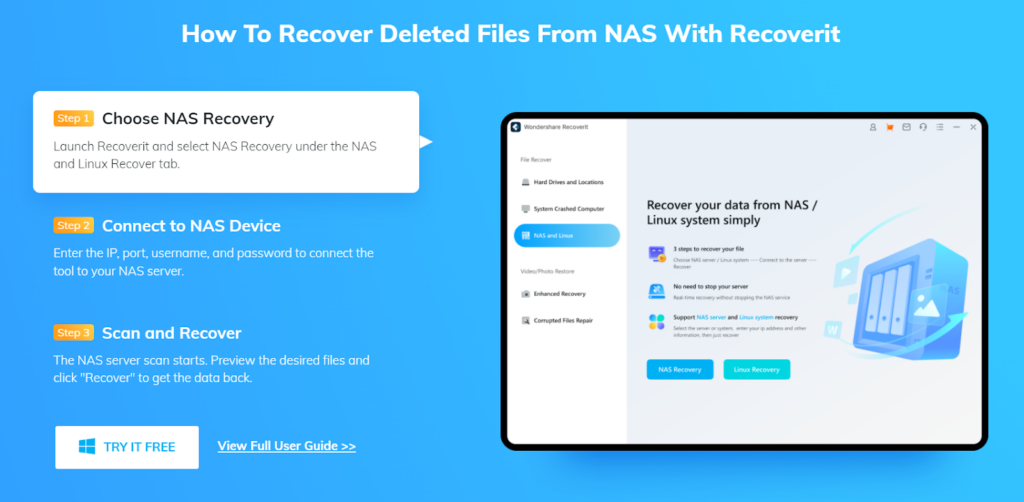
Step 1. Launch Wondershare Recoverit and choose NAS Recovery mode
Download, install, and open the software on your system, and on the main interface choose the “ NAS and Linux” option from the left side panel. On the right-hand side click on the “ NAS Rcovery” button.
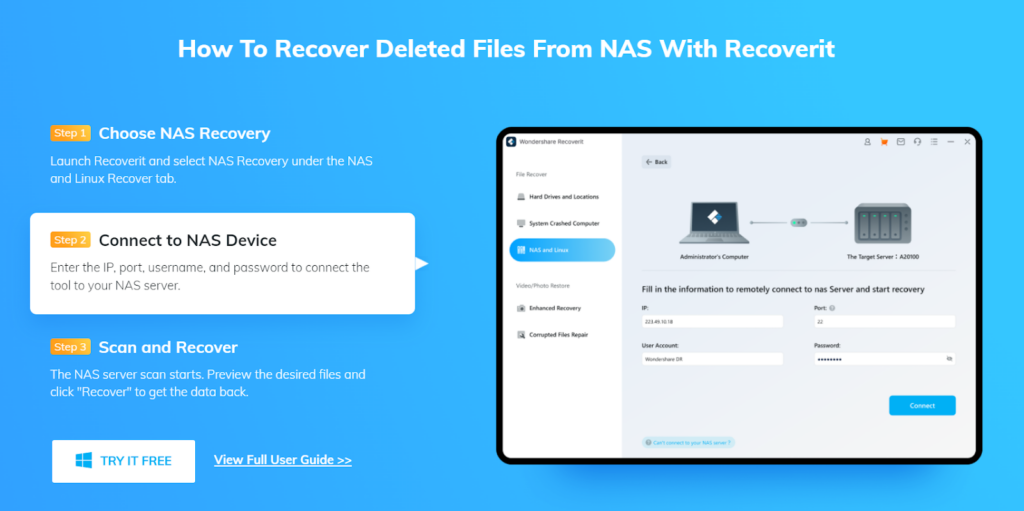
Step 2. Connect the NAS device
The software will search for the NAS storage device from which the data has been lost. The detectable devices will appear under “ NAS Servers” on the interface.
Next, choose the device from where you want the data to be recovered and move ahead.
Enter the desired information and click on the Connect button which will establish a remote connection and automatic scanning of the lost and deleted data of the selected NAS device will start.
Step 3. Recover and Save files
Once the scanning process is complete you can preview the files that can be recovered. If needed, the scanning process can be stopped in between once you get to see your desired files.
After previewing the files, click on the Recover button and choose the path to save the recovered files.
Note: Make sure to choose the path that is different from where the file was deleted or lost.
With this, the data recovery from the NAS device will be completed using Wondershare Recoverit.
Conclusion
Synology NAS Servers are best for your data storage and organizational requirements and if there is data loss from these NAS devices, Wondershare Recoverit works as the best solution for quick, filtered, and easy recovery.