Smartphone users need to transfer data from their phones to PCs when their phone storage is full. Imagine you’re stuck in a similar situation when your phone is running out of memory and slowing down gradually.
At that moment, migrating data to a PC could be the only solution to save your data and retain the device’s performance, but you require a data transfer tool. This guide introduces 3 easy and reliable methods to transfer files from Android to PC. You will also find a recommended data transfer tool that supports all Android models and versions.
Post Contents
Part 1: 3 Basic Methods to Transfer Files from Android to PC
There are many methods and techniques to transfer files from an Android phone to a PC, but we have included the 3 simple and quickest solutions. Explore them one by one, along with their comprehensive guides to resolve your query.
Method 1: Nearby Share
Nearby Share is a handy function developed by Google that helps users transfer data through a wireless connection. You can change the connection settings to receive files from anyone or only trusted devices.
The newer Windows version even has the built-in Nearby Share feature to facilitate an easier sharing process. If you prefer wireless mobile-to-PC file transfer, Nearby Share could be an effective solution. Therefore, the following steps make it easy for you to connect through Nearby Share:
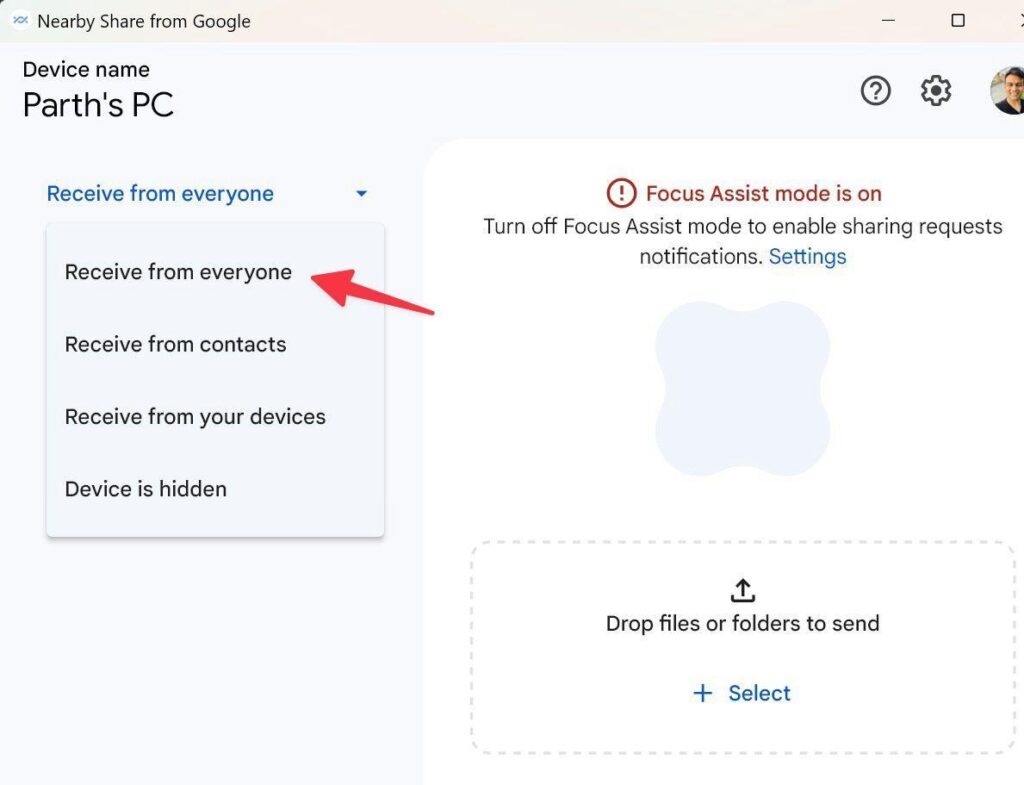
Step 1. Download the Nearby Share tool and run it on your computer by signing in with your Google account. Afterward, choose “Receive from Everyone” from the drop-down menu and enable the “Keep Everyone Mode on All the Time” option to make it ready to receive data from all devices. You can also hit the “Settings” icon to change your PC name and the file’s receiving destination.
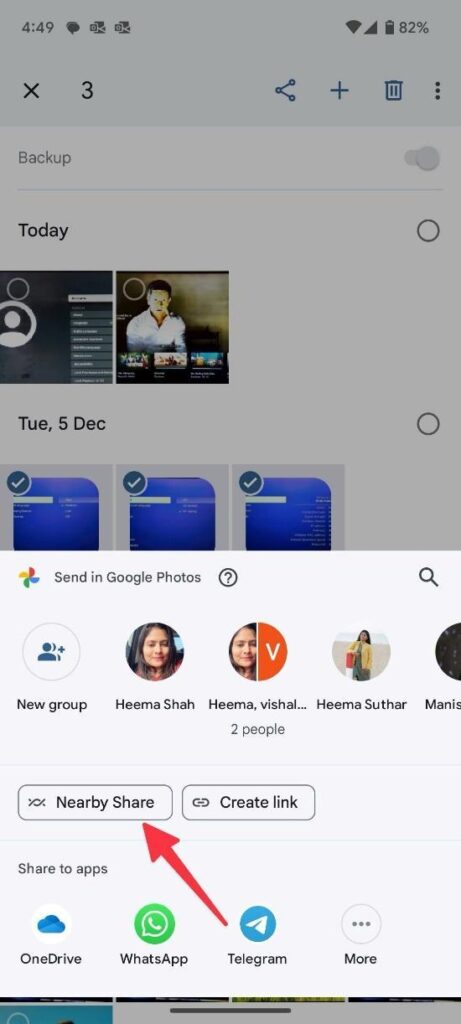
Step 2. On your smartphone, open any file and choose the “Share” option. Then, select “Nearby Share” from the given sharing options. After that, it shows the receiver’s device connected to the same Wi-Fi network. Tap on the device to which you want to send the data. A notification will be sent to a computer, and you have to select the “Save” option to receive data there.
Method 2: USB Cable
Transferring data through a USB cable is a conventional way that most users prefer. Using a USB cable, you can instantly create a stable connection between your Android phone and PC. This method enables phone-to-PC file transfer at a moderate speed without an internet connection.
All you have to do is identify whether your phone is compatible with Type-C or any other cable. After getting a suitable cable, you can follow these steps to transfer files from Android to PC via a USB cable:
Step 1. Connect your Android phone to your computer using a compatible cable and swipe down on the screen to check the “USB for” notification. Tap on it to see more USB options, and there, you select the “Transferring Files/Android Auto” option to show your phone data on your PC.

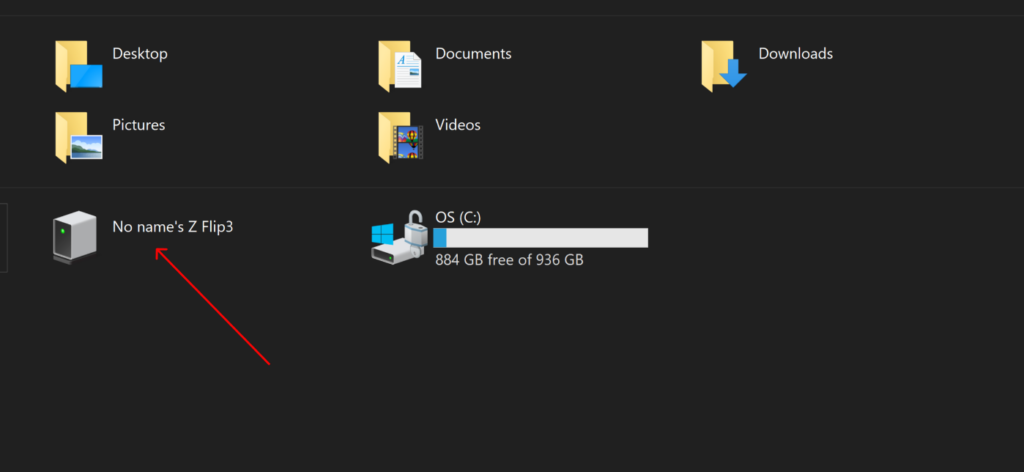
Step 2. After that, move into “This PC” from “File Explorer” and open the folder named after your phone. Once you access data from a computer, copy or move the files you want to transfer, go to the destination in PC storage, and paste them there. The transfer process will start, and you have to wait until it is completed.
Method 3: Microsoft Phone Link
Microsoft Phone Link tool provides a wireless method to connect your smartphone to your PC. For this, you have to ensure that both your devices are connected to the same Wi-Fi or internet service. This method is simple, and professionals often use it to streamline data migration processes.
Most of the Windows devices have this application pre-installed in their system. If your system does not have this tool, follow these steps to link your smartphone to the PC using the Microsoft Phone Link:
Step 1. Open your Microsoft Store to download the Phone Link application and launch it on your computer. Upon launching, log in with your Microsoft account to initiate the data transfer process. Then, click on the “Android” option to generate a QR code for connection with your mobile.
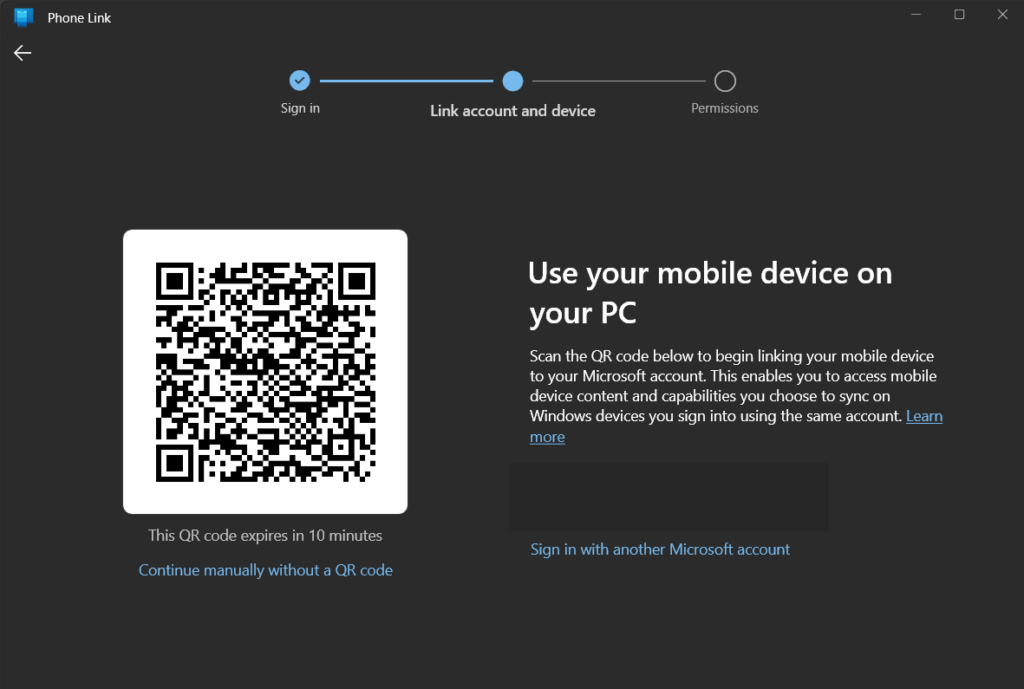
Step 2: Install the “Link to Windows” application from the Google Play Store on your Android phone. Launch it and hit the “Link your phone and PC” option. Then, scan the QR code generated on the PC version to sign in on the mobile app successfully.

Step 3. Following this, provide all the necessary permissions and hit the “Continue” button on your PC app to get started with data transfer. Now, press the “Photos” tab, drag files from the Phone Link app, and drop them to your PC. You can also “Right-click” a file, choose “Save as” from the context list, and save it to your desired location in computer storage.

Part 2: The Most Innovative and Smartest Way to Transfer Files from Android to PC
The above methods need you to set up data transfer from Android to PC for different models. If you want a direct solution to share files on all devices, Wondershare MobileTrans is the most recommended data transmission app. This tool supports different versions and models to migrate data between connected devices.
Luckily, you can transfer 5 types of data from computer to phone, including videos, photos, text messages, music files, and apps. If you are wondering how to transfer contacts from Android to PC, worry not because MobileTrans has a separate restore and backup feature to save your contacts on the computer.
Key Features
- This tool is compatible with thousands of smartphones and tablets manufactured by brands like Samsung, Huawei, Xiaomi, and LG.
- With MobileTrans, you can experience a one-click solution to transfer personal data from your Android device to your PC.
- Users can check several files and their details to see which files will be exported to their computer.
Steps to Transfer Files from Android to PC Seamlessly Using Wondershare MobileTrans
Unlike other daunting methods, MobileTrans offers the simplest method to transfer data from Android to PC. You can follow this easy step-by-step guide for data transmission from your smartphone to your computer:
Step 1. Launch the Application and Choose Export to Computer Function
To begin the data transfer procedure, download MobileTrans software from the official platform and launch it on your computer. After that, link your smartphone to the PC using a USB cable. Then, select the “Phone Transfer” tab to see related functions on the dashboard. Afterward, choose “Export to Computer” to export phone data to a PC.

Step 2. Select Data to Transfer to PC from Smartphone
The tool will show details of all videos, photos, apps, music, and text files available on your phone. Now, select the data that you want to export to the computer. After choosing the data, hit the “Export” button to start the data export process.

Step 3. Keep Your Phone Connected Until a Successful Transfer
After pressing the “Export” button, the selected files will start exporting to the computer, and you can see the Export progress bar. Here, you need to ensure successful connectivity between the phone and PC. The connection should be disrupted until the files are exported.

Final Words
We have provided some authentic methods to transfer files from Android to PC without restrictions. However, Wondershare MobileTrans stands out from the rest by delivering more value and convenience to users. They can transfer videos, photos, documents, and other files from any model by following the simple steps explained in this article.